Diane’s Chimney Rebuild
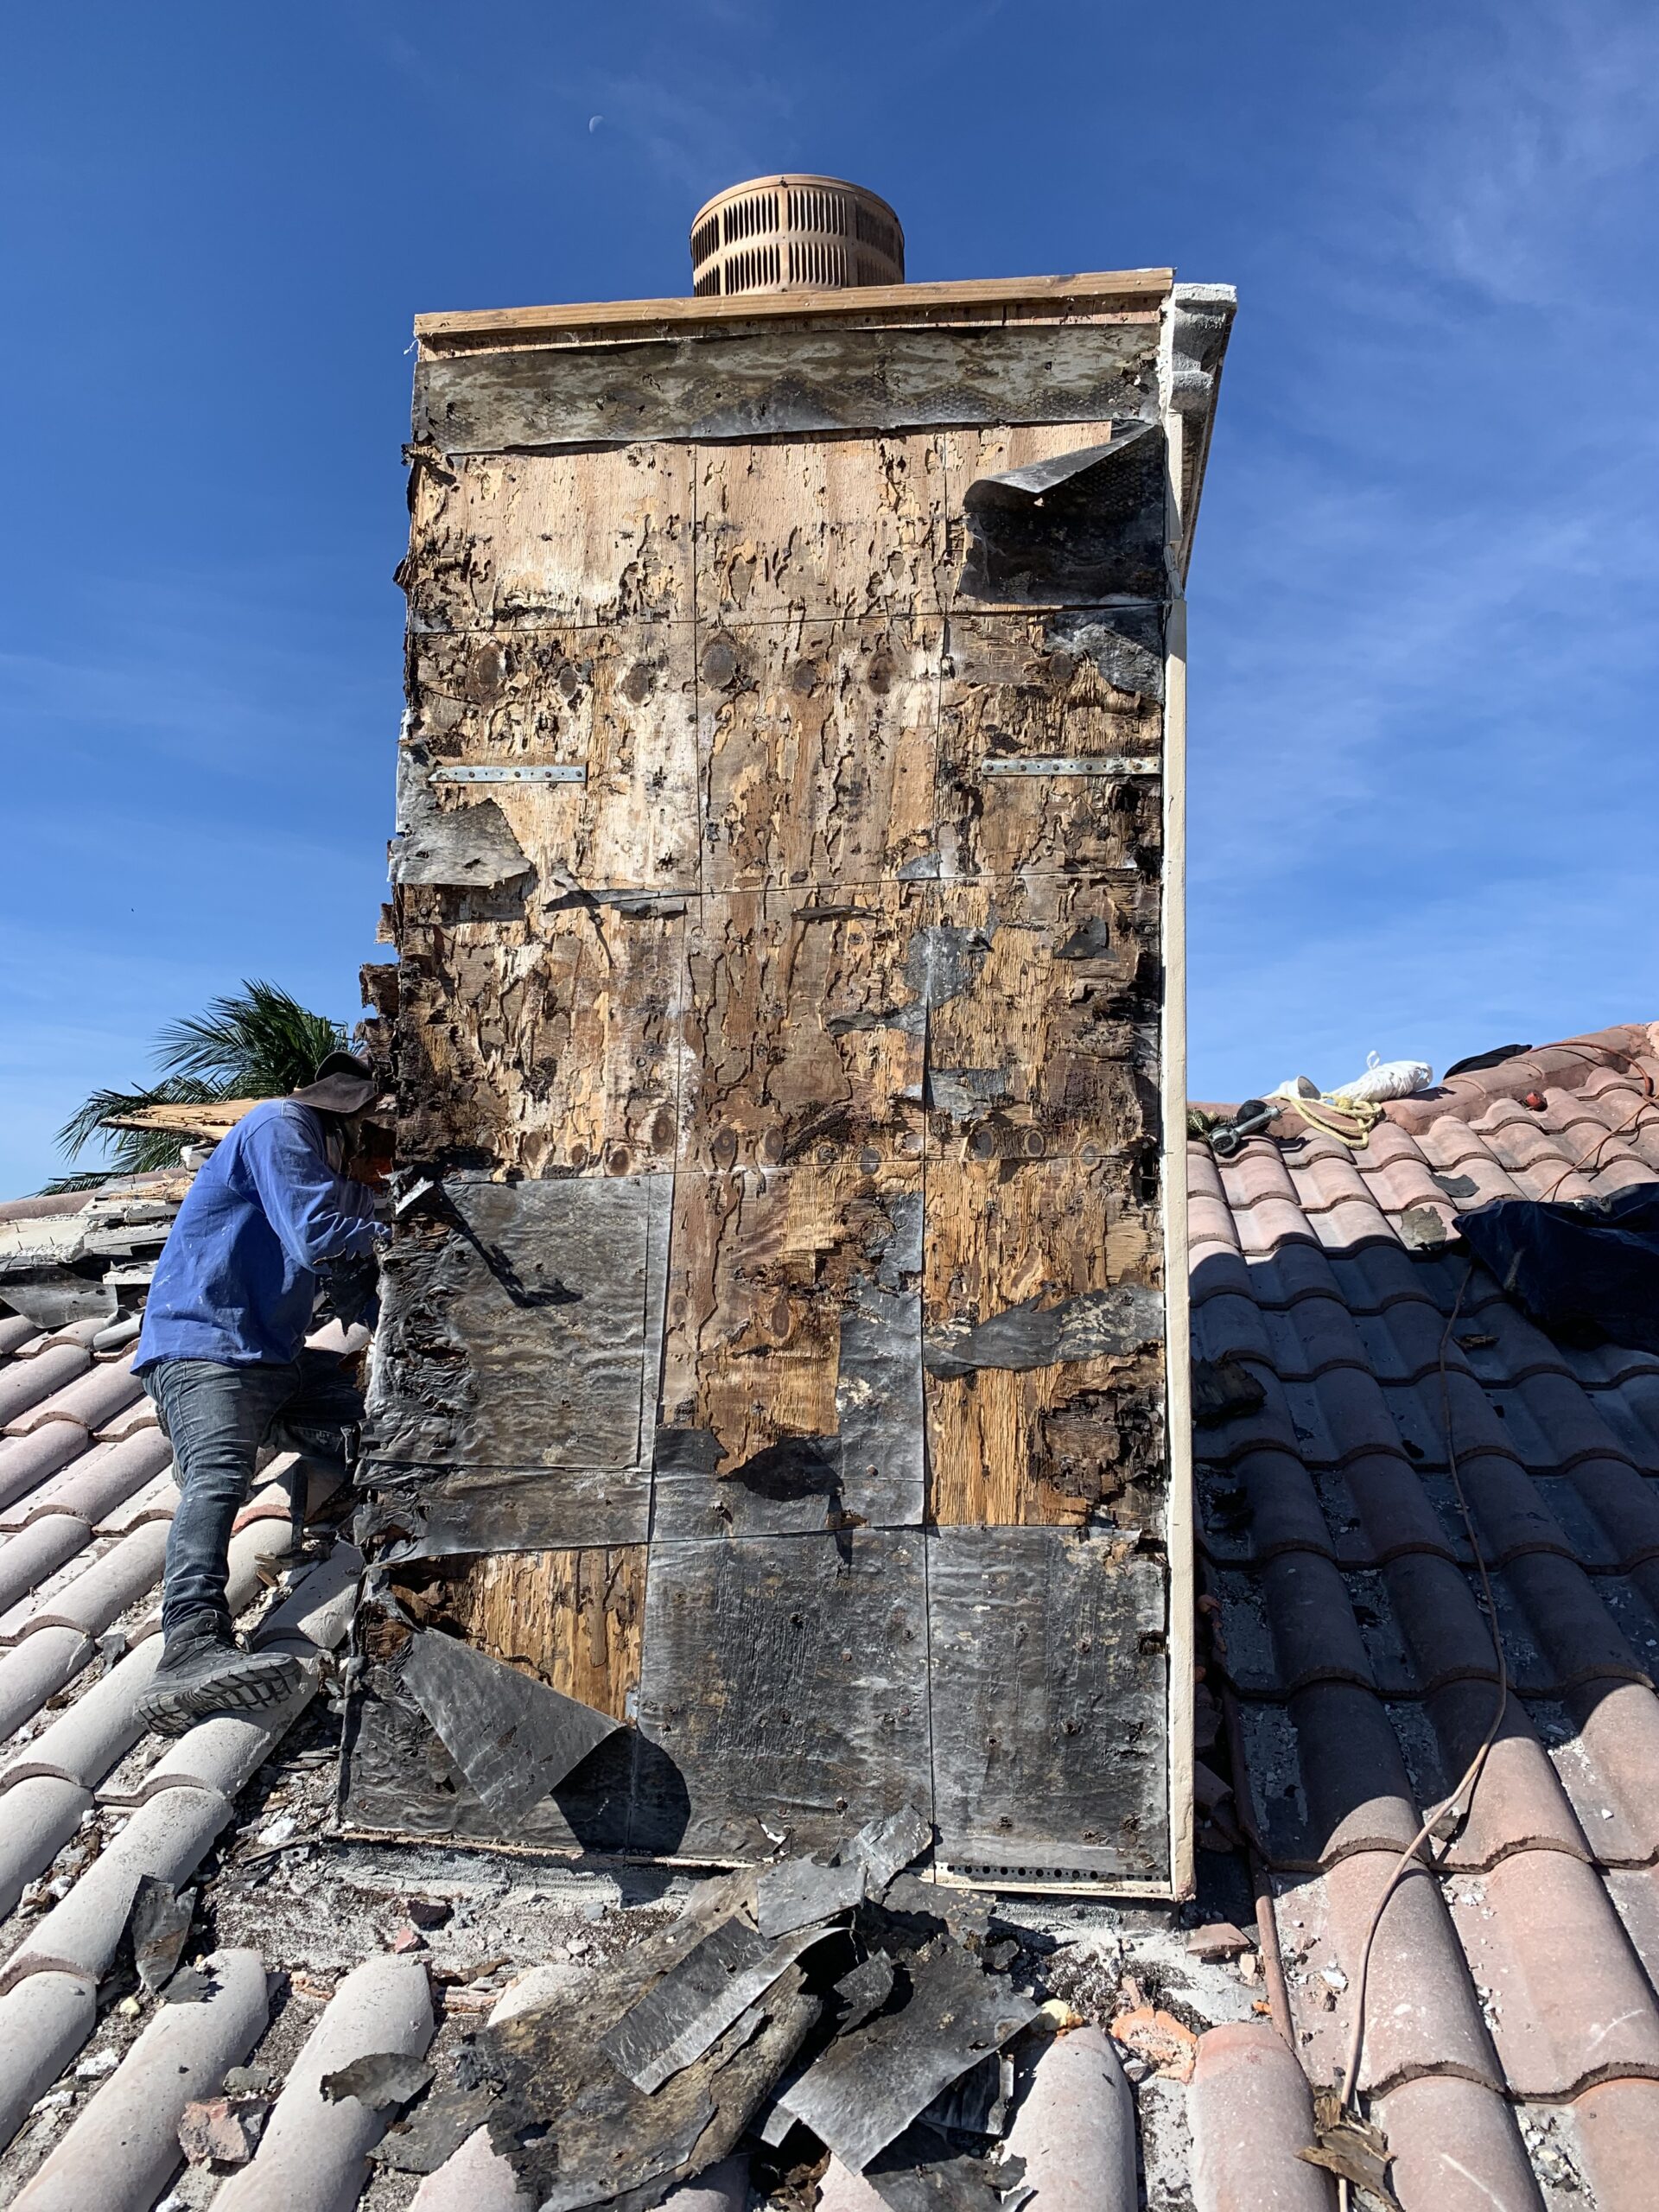
Diane thought she had a roof leak and found us on the internet. The leak was in the master bedroom on the second floor. Kris climbed into the attic and identified that the leak was not coming from the roof but rather from the chimney. Upon further inspection, Kris discovered that the wood-framed chimney had been leaking for some time, resulting in extensive rot in the chimney’s sheathing and wood frame. Diane found our repair proposal price fair and approved the project.
When the crew arrived to make the repairs, they followed a systematic approach to address the issue thoroughly and ensure a long-lasting solution.
Step 1: Removing Roofing Tiles
The first step involved removing the roofing tiles around the base of the chimney to expose the base flashing. This allowed the crew to assess and repair the base flashing properly. Care was taken to ensure a watertight seal at the end of each workday, preventing any leaks during the repair process.
Step 2: Removing Stucco and Addressing Rotten Wood
Next, the team removed all the stucco from the four walls of the chimney. With the stucco gone, they exposed the underlying rotten wood sheathing. Once the plywood was removed, the damaged framing became accessible. All the rotten framing was carefully removed and replaced with new 2” x 4” lumber, restoring the structural integrity of the chimney.
Step 3: Replacing Plywood and Applying a Vapor Barrier
After the framing repairs were complete, the crew installed new plywood to replace the removed sections. To ensure the chimney was protected from future water damage, a vapor barrier was applied. This was followed by the installation of wire lath to provide a sturdy base for the new stucco. Corner bead was added to all four corners, creating clean and crisp corner details for a professional finish.
Step 4: Fabricating a New Chimney Cap
The final structural step involved fabricating a new chimney cap onsite. Using aluminum sheets, the crew custom-built a cap with a drip edge on all four sides to prevent water from running down the chimney walls. Additionally, a new spark arrestor was fabricated and securely affixed on top, ensuring both functionality and compliance with fire safety standards.
Step 5: Restoring the Roof
With the chimney repairs completed, the roofing tiles were carefully put back in place. The crew ensured that the roof’s integrity was restored and that the tiles blended seamlessly with the surrounding roof.
Project Completion
The entire repair process was executed efficiently and with attention to detail. Diane was very pleased with the outcome, noting the high quality of workmanship and the thoroughness of the repairs. The new chimney not only resolved the leak issue but also enhanced the durability and appearance of her home.

